How to Set Up a Recording Studio: Case Study With Genie Mixed It
Share

We recently worked with an up and coming music producer out of the midwest! Here is a little info from our featured music maker:
"My name is Eugene, people call me Genie. I’m 24 years old & I’ve been making music for 8 years now but more professionally the past 4. I’m an audio engineer/recording artist/entrepreneur and a full time dad. Born and raised in Des Moines, Iowa."
Support Genie:
- Instagram: @geniemixedit
- Facebook: @geniemixedit
- Website: smarturl.it/followgenie
Check out the before and after hand clap test results from the booth. The results are dramatic!
In the before recording you can hear a loud noticeable echo with a long time for the sound to decay after the clap. After the acoustic treatment was placed in the room you cannot hear any echo and the overall reverberation in the room is much more subtle and not noticeable on the recording.
With proper acoustic treatment like Genie you can get crisp and clear audio recordings!
Genie created a recording studio with a separate vocal booth and control room. This involved acoustic treatment for two separate spaces.
What are the benefits of a multi room studio space?
The benefit from having a vocal booth separate from the mixing area is that it allows the engineer to have more control over the sound of the recordings. Genie also included a window between the two room so there is a clear patch for non-verbal communication between the engineer and the rapper or singer.

The downside is that it can be more expensive and time-consuming to set up, as you need to build or buy two separate spaces and treat them acoustically. If you will make an income from your studio like Genie it may be worth it to invest into a multi room setup.
If you are simply doing some hobby production in your spare time in your basement or a bedroom then you would be fine with treating a single room. If you need a vocal recording area in your single room you can always build a vocal shield or create a vocal booth area of the room like in the corner of a room shown below.

How do you treat a vocal booth for best sound?
The first thing to consider is the size of the room. A small room will have a very different acoustic signature than a large room, so it's important to choose treatments that are appropriate for the space you have.
Larger vocal booths like Genie's can be more forgiving than smaller vocal booths. This is because the smaller the room, the more problems with standing waves and room modes. You will want to go with full coverage on smaller vocal booths and closet type setups.
The pic below shows Genie's recording booth with the panels placed evenly on the walls and the ceiling creating a wonderful environment for recording vocals and more!

In general, you want to absorb as much sound as possible in a vocal booth. This means using materials like acoustic panels to absorb sound energy. You also want to make sure that the room is well-sealed so that sound doesn't leak in or out. Typically vocal booths will have up to 70% coverage in the room depending on the size of the room and the preference of the studio owner.
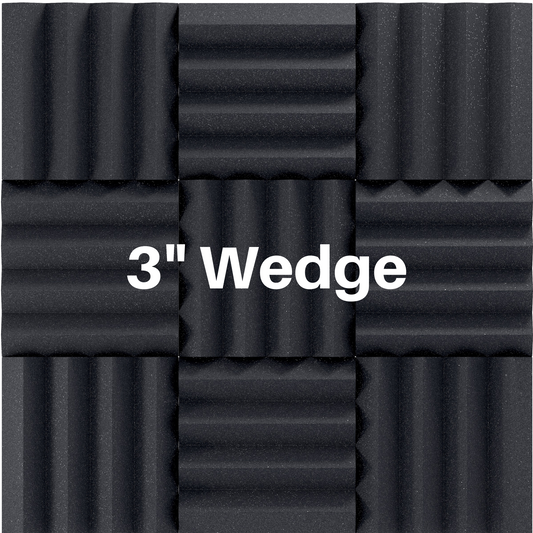
The most important spots to treat inside the booth are the main reflection points, and the area around the vocal performer. Genie covered these areas with our 3 inch acoustic foam wedge panels.
Notice the carpet in the room as well. This helps to further dampen the reverb inside the room and also helps cut down on the second reflections.

What is the best acoustic treatment for a control room in a studio?
You will need to add acoustic absorption to the walls and ceiling inside of the control room. This will help reduce echoes and sound reflections that can interfere with the mixing or mastering process.
The first step is to find the main reflection points in the room and treat those with absorption panels. The main reflection points are shown in the diagram below.

By treating the reflections points with absorption you will be creating what is called a reflection free zone (RFZ) at the listening position. The RFZ is the area in front of your monitors where reflections from the speakers are suppressed. This gives you a "dead" spot to work in, which is essential for mixing and mastering.
You also want to add bass traps in the room. Corner bass traps are an effective way to deal with low frequency build up in a room. The acoustic paneling combined with bass trapping will give your room the flat frequency response you are looking for.
You can see Genie did an amazing job with the install! Make sure to hit him up if you need any professional mixing of mastering services!

Don't forget to support Genie:
- Instagram: @geniemixedit
- Facebook: @geniemixedit
- Website: smarturl.it/followgenie
We hope this info was helpful. If you have any questions at all please contact us! We are glad to help you with your recording studio!
-------
Read More:

1 comment
I’m happy that you mention that adding acoustic absorption to the walls and ceiling inside the control room is the best way to control the studio room. My friend’s boyfriend is setting up a recording studio here in Midtown Manhattan, NY, since near his studios are establishments. All the tips and information you share here in your post are helpful. I make sure to mention it to my friend about it.https://michaelpirolimixing.com/recording-studio